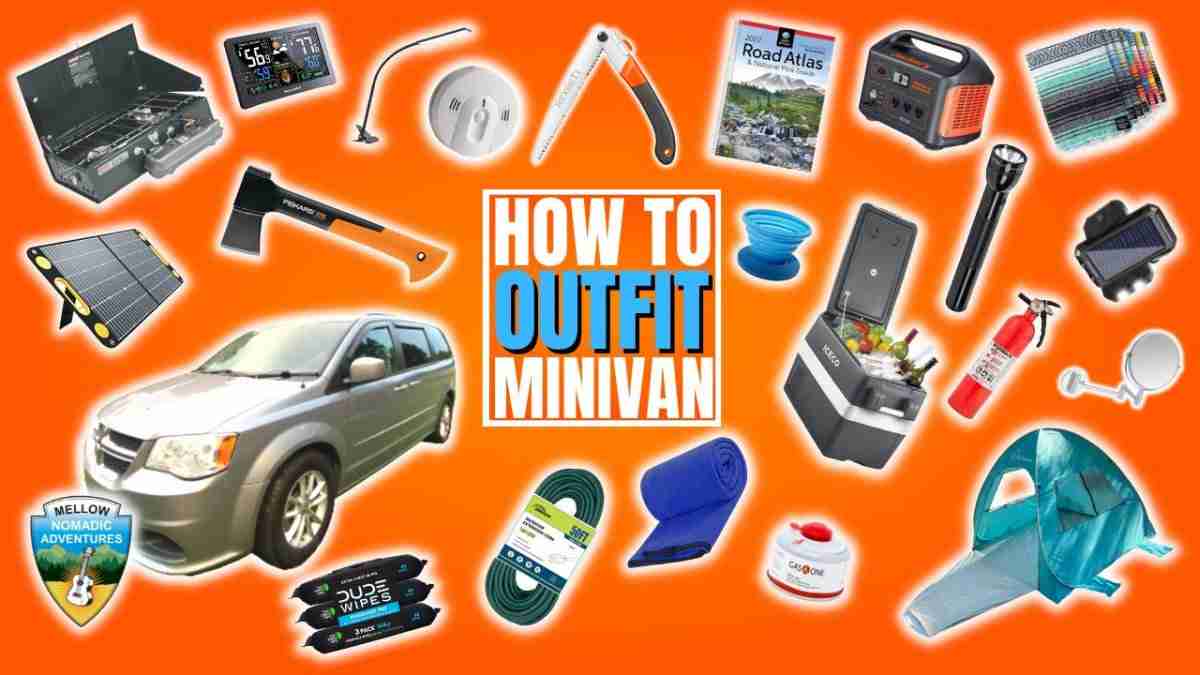
How to Outfit Your Minivan Camper for Van Life
How to outfit your minivan camper conversion is one of the most common questions I get from people starting van life, and it’s easy to overcomplicate. In this guide, I break down the core systems that actually matter: your bed, kitchen, power, lighting, and storage.
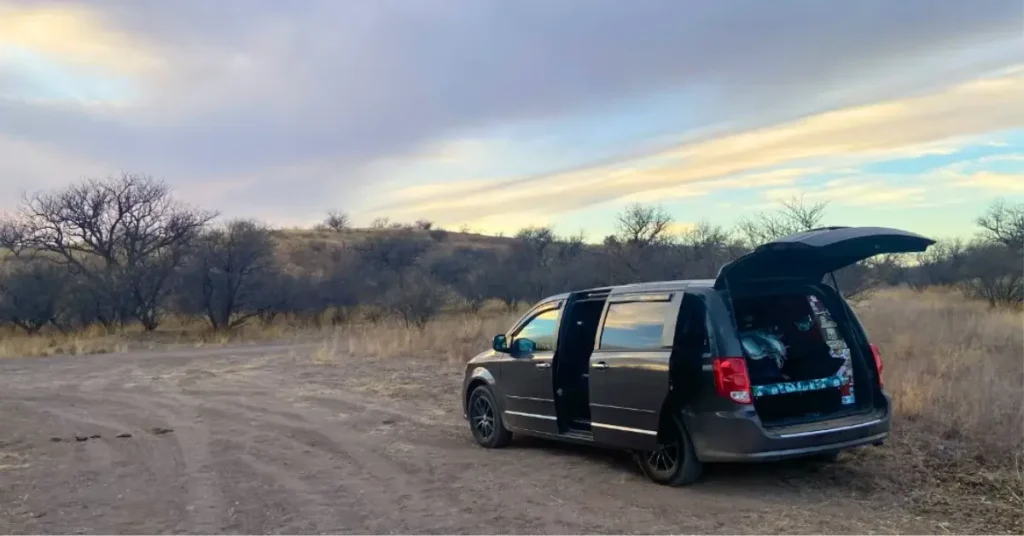
Everything here is based on my real-world minivan camper setup (Voyager) and what I’d prioritize if I were starting over, so you can build something comfortable, functional, and affordable without wasting money or space.
Here’s How to Outfit Your Minivan Camper
To ensure your trip is a success, you will want to have solutions for the following systems:
- Bed
- Power
- Various Lighting
- Kitchen/Food Storage
- Storage & Organization
- Water Storage & System
- Shower/Bathroom Gear
- General Minivan Needs
- Office Supplies
- Navigation & Emergency
Best Minivan Camper Bed Setup (Comfort + Space-Saving)
When you’re figuring out how to outfit your minivan camper conversion, the bed is the single most important decision you’ll make. If you don’t sleep well, everything else, driving, working, exploring, falls apart. The goal isn’t luxury; it’s consistent, comfortable rest in a tight space.
In a minivan, your bed setup needs to balance three things: comfort, footprint, and how easily it converts for daytime use.
What actually matters in a minivan bed setup
- Size efficiency: You don’t have the width of a full-size van, so every inch counts
- Ease of setup: Daily tear-down gets old fast
- Temperature control: Vans trap heat and cold more than people expect
- Storage access: Ideally, your bed doubles as storage space
Common minivan bed options (pros + cons)
- Foam mattress on a platform: Most comfortable and stable, but less flexible
- Tri-fold or memory foam mattress: Easier to stow, slightly less supportive
- Sleeping bags or comforter-style setups: Flexible and cheap, but less insulation underneath
What I use (and why)
I personally use a sleeping bag setup paired with gel pillows, which gives me flexibility without sacrificing comfort. It’s quick to set up at night, easy to adjust for temperature changes, and doesn’t require a bulky mattress taking up permanent floor space. For a minivan camper, that flexibility matters more than people expect.
If I were starting over, I’d still choose a setup that prioritizes ease, adaptability, and good sleep over anything overly complex or built-in.
Bed setup essentials I recommend:
- A quality foam or tri-fold mattress sized for your minivan
- A washable mattress cover (vans get dusty)
- Breathable bedding instead of heavy blankets
- Insulating layer underneath if you camp in colder weather
If you want specific product recommendations that fit minivan dimensions, I break those down in my guide to the best sleeping bags and bedding for minivan camping.
The Exact Brands I Use and Trust
- Zinus 6-inch Memory Foam, Green Tea Infused Mattress – I love my Zinus mattress. It has 4 inches of hard foam and 2 inches of memory foam for a total of 6 inches. It’s soft yet firm which is what I like. The only downside is that you cannot cut this mattress to make it a custom size. I went with the narrow-twin size (which measures 30 inches wide by 75 inches long) because I travel solo. Hopefully, when I meet someone, she will have her own van/minivan and we can caravan together.
- Wise Owl Hammock – Lounging in a hammock suspended over the forest floor is one of the coolest ways to relax. Take a nap, read a book, listen to music or the sounds of the forest… it’s all better in a hammock. I keep this hammock in my travel kit in my minivan camper conversion.
- Coleman Brazos 20/30°F Adult Cool-Weather Sleeping Bag – You probably have a sleeping bag already if you’ve ever gone camping with your family or friends. If not, this 3-season sleeping bag is a great and affordable sleeping bag.
- Fleece Insert for Sleeping Bag – I previously had this fleece insert from my time camping with family and friends throughout Kentucky at places like Green River and Red River Gorge. This is a nice extra layer you can add to your sleeping bag for those colder nights.
- Beckham Hotel Collection Gel Pillows – If you have not experienced a gel pillow, I highly recommend you try these super comfortable gel pillows.
- Waterproof Mattress Cover – I opted for this mattress cover to prevent any moisture from getting onto my mattress. The way I look at it, the mattress is an investment into my minivan camping experience and I wanted to protect it at all costs. Overkill? Probably. However, I’ve never had a problem with mold, mildew, or moisture on my mattress or bed platform.
- Narrow-twin Sheet Set with Fitted Sheet, Top Sheet, & 2 Pillow Cases – To complete the minimalist bed set up for a solo traveler in a minivan camper conversion, I went with this sheet set for a narrow twin. Perfect fit for the Zinus narrow twin mattress.
- Mexican Blanket – This blanket is a staple camping blanket that everyone should have in their minivan camper.
Minivan Camper Power Setup (Portable, Reliable, Low-Stress)
When people ask how to outfit your minivan camper conversion, power is usually the most confusing part, and the most overcomplicated. You don’t need a hard-wired electrical system to live comfortably in a minivan. You need reliable power for the things you actually use, without draining your starter battery or stressing about wiring.
For most minivan campers, a portable power station–based setup is the best balance of simplicity, safety, and flexibility.
What actually matters in a minivan power setup
- Portability: You should be able to move your power source easily
- Recharge options: Wall, car, and solar flexibility matters
- Capacity vs reality: Power what you use daily, not imaginary gear
- Safety: No permanent wiring = fewer failure points
Common minivan power options (pros + cons)
- Portable power stations: Easy, safe, beginner-friendly, scalable
- Solar add-ons: Great for extended stays, optional for most people
- Hard-wired systems: Powerful, but expensive and overkill for many minivans
For a minivan build, starting portable lets you upgrade later without committing too early.
What I use (and why)
I use a portable power station that covers my real daily needs: charging devices, running small electronics, and staying flexible whether I’m driving, parked, or plugged in somewhere. It keeps my setup simple and avoids permanent electrical installs that don’t make sense in a minivan.
I chose portability over complexity because it gives me options. If my needs change, my power setup can change with them.
Power essentials I recommend starting with:
- A portable power station sized to your daily usage
- A 12V car charging cable
- A basic extension or power strip
- Optional solar panel for longer stays off-grid
I walk through my exact setup, why I chose it, and alternatives in my full guide to powering a minivan camper conversion.
If you’re new to this, start smaller than you think. You can always scale up.
You will want to create a list of everything that requires re-charging. Then find out how many watts each item needs. Total up your watts for all your gear and you should be close to having an idea about how much power you need.
If items require batteries, try to use rechargeable batteries when possible. Also, having dedicated storage space and containers will help make life easier.
These are the items that provide power for my nomadic travels:
- Jackery Explorer 240 – This portable power station is great for low-power needs. Has one 110-volt outlet (regular wall outlet type), two USB outlets, and one 12-volt outlet. With an inverter and battery monitor built in and three ways to recharge it, it was a no-brainer for me when I saw it go on sale for $199.
- Jackery Explorer 1000 – I dedicate this 1070 Wh LiFePO4 battery unit to power my 12-volt, compressor refrigerator, 12-volt oscillating fan, and interior LED lighting.
- 10,000 mah Battery pack
- ToGo Power, 120-watt, folding, solar panel
- RICH Solar, 150-watt, Monocrystalline, solar panel
I use a braided steel cable lock to protect my investment from theft:
- Master Lock Braided Steel Cable Lock
Lighting for a Minivan Camper (Bright, Warm, Low Power)
Lighting is one of the most underrated parts of how to outfit your minivan camper conversion, yet it has a huge impact on how livable your space feels. Good lighting makes a minivan feel calm and functional; bad lighting makes it feel cramped and exhausting.
The goal isn’t to flood your van with light, it’s to create enough warm, efficient lighting to cook, work, and relax without draining your power setup.
What actually matters in minivan camper lighting
- Low power draw: Lighting should barely register on your power usage
- Warm color temperature: Harsh white light kills the cozy vibe fast
- Flexibility: You’ll want light in different spots at different times
- Easy setup: No hardwiring required for most minivan builds
Common lighting options (pros + cons)
- LED strip lights: Bright, efficient, and great for general lighting
- Rechargeable puck or tap lights: Perfect for targeted light where you need it
- Headlamps or clip lights: Simple, portable backups that always come in handy
- Hardwired lights: Clean look, but unnecessary for most minivan campers
For a minivan, portable and rechargeable lighting wins every time.
What I use (and why)
I rely on low-draw LED lighting combined with small rechargeable lights that I can move around as needed. This keeps my space evenly lit without committing to a fixed layout, and it means I’m never stressing about power just to see what I’m doing.
It’s a simple setup, but it makes a big difference in how comfortable the van feels at night.
Lighting essentials I recommend starting with:
- Warm-toned LED strip or rope lights
- One or two rechargeable puck or tap lights
- A compact headlamp for hands-free tasks
- Charging cables that live with your lighting gear
I keep lighting intentionally separate from my main power system so it’s easy to adjust without rewiring anything.
- Rechargeable Headlamp
- Battery-operated LED Star String Lights
- MagLite Flashlight
- Mounting Brackets for MagLite Flashlight
- Dimmable, Clip-on, USB, Gooseneck, LED Desk Light
- 2 Rechargeable, Magnetic, LED Lights (I bought these at Home Depot)
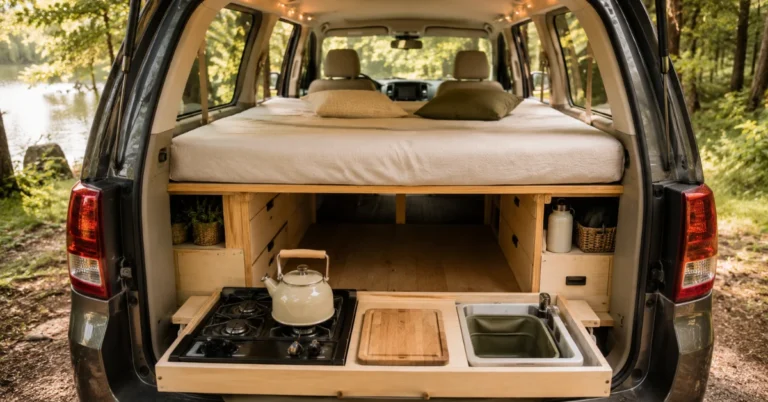
Minivan Camper Kitchen Setup (Simple, No-Fuss Cooking)
When deciding how to outfit your minivan camper conversion, the kitchen is where most people overbuild. You don’t need a full galley or permanent cabinets. You need a setup that lets you cook quickly, safely, and with minimal cleanup.
In a minivan, the best kitchen setup is modular, easy to stow, and flexible enough to work inside or outside the vehicle depending on weather and space.
What actually matters in a minivan kitchen
- Simplicity: Fewer parts = faster meals and less frustration
- Ventilation: Cooking smells linger fast in a small space
- Packability: Everything should store away when not in use
- Versatility: Indoor backup + outdoor primary cooking is ideal
Common minivan kitchen approaches (pros + cons)
- Portable stove (butane or propane): Simple, affordable, and flexible
- Electric cooking devices: Convenient but power-hungry
- Permanent built-ins: Look great, but eat space and reduce flexibility
For most minivan campers, a portable stove + basic cookware is the sweet spot.
What I use (and why)
I keep my kitchen setup intentionally minimal: a portable stove, a few essential cooking tools, and gear that stores easily when I’m done. This lets me cook outside when the weather’s good and keep things simple inside when it’s not.
I avoid fixed kitchen builds because they lock you into one layout and make daily living harder in a small vehicle. Flexibility wins in a minivan.
Kitchen essentials I recommend starting with:
- A reliable portable stove (butane or propane)
- One solid pan and one multipurpose pot with removable handle
- A compact cutting board and knife
- Collapsible or nesting dishware
- A simple water container for cooking and cleanup
If you want to go deeper, I break down my full cooking gear and space-saving setup in my van life kitchen gear guide.
Stove options
If you already have any type of camping stove, start there. If not, these are the stoves I use or have used. It’s important to have a backup stove because your fuel source may not always be available where you are. Whenever possible, opt for a stove with a dual-fuel option.
- Two-burner, Dual-fuel, Coleman Camping Stove – I started with this classic camping stove. While I did enjoy the two burners, wind blockers, and dual-fuel capability, I found that I did not enjoy messing with the liquid fuel. This stove uses what’s called white fuel or you can use unleaded gasoline. Either way, it’s liquid fuel which can be spilled, dripped, and give off strong fumes.
- Single-burner, Dual-fuel, GasOne Camping Stove – After my first year of traveling in Carol the caravan, I discovered I rarely if ever used two-burners. So before my second trip west, I invested in this single-burner, dual-fuel camping stove from GasOne. This stove will use the common, small propane canisters or butane cans. Simple to light and use and comes with a plastic carrying case.
- Butane, Single-burner Hiking Stove – This small single-burner hiking stove is super affordable and great for getting water hot for a cup of coffee in the morning. This stove was a gift and I use it very often. It features an easy push-button ignition making lighting this stove fast. Another pro is that it is extremely compact which is perfect for a minivan camper.
- Isobutane Fuel Canister – This is the type of fuel canister I use with the single-burner hiking stove.
Food Storage
- Iceco, JP40, 12-volt, Compressor Refrigerator – This Iceco refrigerator is amazing! I have had ZERO issues with this fridge. It can be either a freezer or a fridge, but not both. It has a removable basket, an LED light that comes on inside when you open it, and comes with its own custom-fitted/vented case. I power this with the Jackery Explorer 1000 and a Rich Solar 150-watt monocrystalline panel. Perfect setup for a minivan camper conversion.
- Collapsible Dish Basin with Drain – This sink is great for a minivan camper because it saves space by collapsing down.
- Collapsible, Silicone Food Storage Containers – These storage containers are not terrible. Not so air tight I’ve noticed.
- Collapsible, Pour-over Coffee Dripper – Simple and effective pour-over coffee dripper.
- Nonstick Pot and Pan with Removable Handle – After my first year on the road, I upgraded to this three-piece set. Easy to clean and use. The removable handle is perfect to be able to store this in a minivan camper with limited space.
- Magnetic Paper Towel Holder – Because I do have a kitchen cabinet/chuck box in the rear of my minivan camper, I bought a two-pack of these magnetic paper towel holders to use outside the van.
- Silicone Dish Washing Scrubbers – Mold resistant dish scrubbers.
- Campsuds Outdoor Soap – Biodegradable soap.
- Sportneer Folding Table – At the time, they offered a black one and it’s a nice little table to have beside your camp chair to place drinks on.
- 9-inch Clam Shell Tongs – Tongs for picking up hot food to turn or flip on the griddle.
- Stainless Steel Spatula – Pancake flipper.
- Lodge Pre-seasoned, Reversible, Cast-iron, Grill/Griddle – After my first year on the road, I decided to leave this piece behind during my second year of travel because I just didn’t use it. And with limited space in the minivan camper, I think it was a good call. I never missed it the second year even though this is an awesome piece that I still use at home.
- Lodge Pan Scrapers – Cast iron safe scrapers for your Lodge cast iron.
- Commercial Grade, Stainless Steel Scraper – Can be used to remove hot grime and dirt from the griddle.
Minivan Camper Storage & Organization (Livable, Not Cluttered)
Storage is where how to outfit your minivan camper conversion either comes together or completely falls apart. In a small space, clutter builds fast, and once things stop having a “home,” daily living gets frustrating.
The goal isn’t to maximize storage at all costs. It’s to create simple, accessible organization that keeps your essentials within reach without turning your van into a maze of bins.
What actually matters in minivan storage
- Accessibility: You shouldn’t have to unload half the van to find one item
- Multi-use spaces: Storage that doubles as seating or sleeping space is ideal
- Flexibility: Needs change as you travel, your storage should adapt
- Weight awareness: Overloading a minivan affects handling and fuel economy
Common minivan storage approaches (pros + cons)
- Soft bins and duffels: Flexible, lightweight, easy to rearrange
- Drawer units or crates: Organized but can eat valuable space
- Under-bed storage: Efficient, but only if access is easy
- Permanent cabinets: Clean look, but reduce adaptability
For minivans, modular and removable storage usually beats anything built-in.
What I use (and why)
I use a mix of soft storage bins and simple organizers that can be moved or reconfigured depending on the trip. This keeps my setup lightweight and makes it easy to adjust as my needs change, whether I’m traveling, working, or staying in one place for a bit.
Instead of building permanent storage, I focus on keeping items grouped by use: sleeping gear, kitchen gear, tools, and daily essentials. That alone eliminates most clutter.
Storage essentials I recommend starting with:
- Soft bins or duffel bags for flexible storage
- One or two stackable crates for frequently used items
- Under-bed storage for bulky gear
- Small organizers for cables, tools, and odds and ends
If you can’t grab something in under 10 seconds, your storage setup needs simplifying.
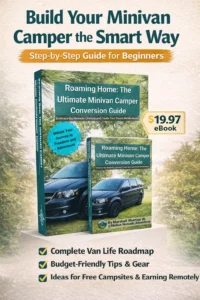
Building out each of these systems from scratch without a plan wastes time and money. The Roaming Home guide walks through every system in order with exact materials and a budget breakdown so you build it right the first time.
How to Outfit Your Minivan Water System
It’s important to have water storage and some type of pump to access the water when you are living the van life in a minivan camper conversion.
- USB Rechargeable Drinking Water Pump
- Potable Water Purification Tablets
- 4-way Sillcock Key
- Collapsible Water Container
- LifeStraw Personal Water Filter
Shower/Bath
- Wall-mounted Double-sided Vanity Mirror – Perfect for when I need to trim my beard.
- Youphoria Microfiber Travel Towel – Microfiber towels are excellent in a minivan camper conversion as they take up less space than traditional towels. Plus they dry quickly.
- Rainleaf Microfiber Travel Towel
- Beard Bib
- Dude Wipes
- Shower/Bath Bag
- Rechargeable Electric Beard Trimmer
- A Case for Beard Trimmer
General Minivan Needs
- Fire Extinguisher – In case of fire.
- 50-foot Outdoor Extension Cord – Gives you a way to plug in your Jackery while parked near an electric outlet.
- Set of Two Telescoping Tarp Poles – I plan to use these poles along with a tarp to create a DIY awning.
- Magnetic Cell Phone Mount – My favorite cell phone mount that allows me to get my phone out of my hand ASAP when I get in the van.
- Adjustable Blind Spot Mirrors – Allows you to get the best angle to see who is in your blind spot.
- Stainless Steel Marine Grade Snap Button Kit – I used this DIY snap kit to hang my blackout curtains between the cab and back area of the van.
- Thermal Insulated Rod Pocket Blackout Curtain – Ultimate stealthiness unlocked with a blackout curtain between the front and the back.
- Drop Stop Seat Gap Filler – There comes a point when you get tired of dropping your phone between your seat and the console. That moment came for me and I ordered these and have never experienced that problem since. Love it!
- Textured Blue Faux Grasscloth Contact Paper – Simple way to change the color of furniture pieces while adding texture at the same time. The best part is, once you tire of it, just rip it off and go with the next color.
- 3-strand Lightweight Synthetic Rope 1-inch Diameter – I used this as a decorative accent along the ceiling and my header piece that the blackout curtain attaches to.
- Fleur-de-Lis Drawer Knob – This is the perfect drawer pull for my custom-designed and built kitchen cabinet in my minivan camper conversion.
- 2-inch wide x 15-feet Heavy Duty Velcro Tape with One-wrap Cable Ties – Velcro has so many uses and the bonus cable ties come in handy to keep cables organized.
- 48-inch x 10-foot Double Bubble Reflectix – My window covers use Reflectix on 2 of the 5 layers.
- Fiskars Hatchet – Perfect for splitting wood for the campfire.
- Folding 11-inch Hand Saw – Great piece of gear to have in your kit to cut down longer pieces of wood.
- Wireless Weather Station – Discover what the weather is without having to look out your windows. The perfect way to check the weather while remaining stealthy in your minivan camper conversion.
- Traceless Super Sticky Gel Pads – These sticky gel pads are great at keeping things from sliding around while you drive.
Office Supplies
- Thank You Cards Set of 100 – Thank you cards always come in handy. I use them to send to my YouTube channel members.
- Kimwipes Glasses Tissue Wipes – Excellent to use with a cleaning spray for your glasses. Won’t scratch your lenses.
- PNY Pro Elite 500 GB 3.1 Gen 2 Type-C Portable Solid State Drive – Super fast hard drive to back up all of the photographs and video footage I create while traveling in my minivan camper conversion.
- External Hard Drive Carrying Case – This case keeps my hard drive safe.
- 8-inch Cable Ties pack of 150 – These can come in handy when things break or to help keep wires organized.
- Grab-A-Card Outdoor Business Card Holder – Simple way to have your business cards available when attending meet-ups and events in your minivan camper conversion.
How to Outfit Your Minivan for Navigation & Emergency
- Rand McNally 2023 Road Atlas & National Park Guide – Learn about your favorite National Parks and have a way to navigate when you lose cell service.
- Ferrocerium Alloy Rod Fire Starter & Striker – Start a fire anytime with this set.
If you want the complete build checklist with every system covered, bed, power, kitchen, water, storage, and more, the Roaming Home guide has it all in one place. Under $20 and instant download.
FREE Nomadic Life Starter Kit:

Find Your People: Nomadic, Vanlife, and RV Meetups:

Planning your first trip? Check out the 2026 Nomadic Gatherings Guide for minivan
camping meetups, vanlife events, and nomadic community gatherings happening
this year.